Embossed Elegance: a Guide to Traditional Parchment Craft
I still remember the first time I sat down with a stack of expensive vellum and a set of professional embossing tools, convinced that I needed a thousand-dollar studio setup to make anything worthwhile. I spent hours staring at a piece of paper that looked more like a crumpled napkin than art, feeling completely defeated by the sheer finesse required for parchment craft (Pergamano). It felt like there was this invisible barrier between me and the delicate, translucent beauty I saw in high-end boutiques, and honestly, I almost threw the whole kit in the bin.
But here’s the truth: you don’t need a master’s degree or a bank account to melt your way into this craft. I’ve spent years making every possible mistake—from scorching the edges to over-working the embossing—so that you don’t have to. In this guide, I’m stripping away the pretension and giving you the straight-up, practical techniques you actually need to master the art. We aren’t going to waste time on fluff; we are going to focus on real results that turn simple paper into something truly breathtaking.
Table of Contents
Mastering Essential Parchment Craft Techniques

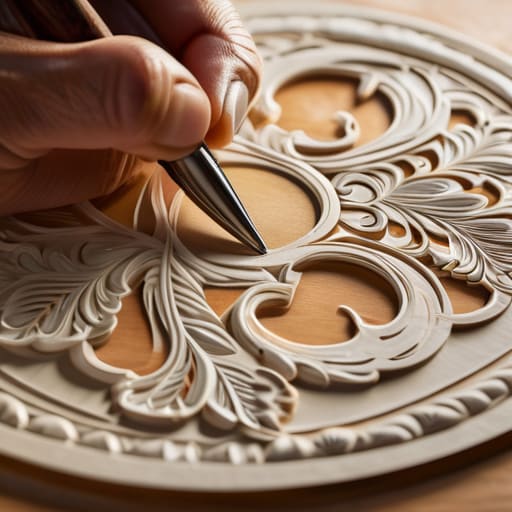
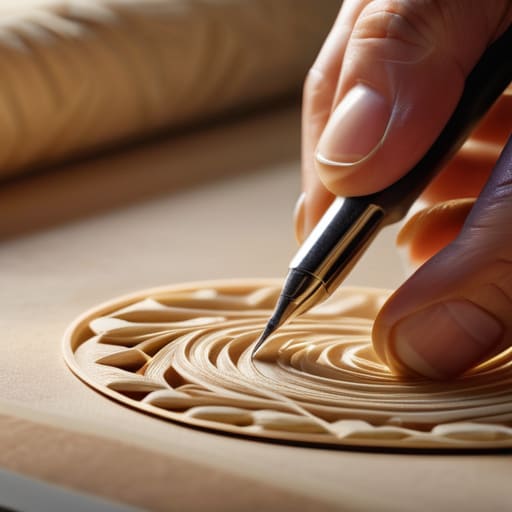
To really get the hang of this, you need to move beyond just pressing down on the paper. It starts with the fundamentals of embossing, where you use specialized embossing tools for pergamano to lift the fibers of the parchment. You aren’t just making marks; you are sculpting. It takes a steady hand and a bit of muscle memory to ensure your lines are crisp without tearing the delicate surface. I remember my first few attempts—I was far too heavy-handed, and my patterns looked more like crumpled napkins than art.
Once you’ve mastered the pressure, the real magic happens when you start creating paper lace designs. This is where the artistry truly shines. By layering intricate, swirling motifs and using fine-tipped tools to refine the edges, you transform a flat sheet into something that looks almost translucent. It’s a slow, meditative process of building up delicate paper embossing patterns layer by layer. You’ll find that the most beautiful results come from patience, not speed; let the tools do the heavy lifting while you focus on the flow of the design.
Selecting Premium Parchment Art Supplies
Let’s be honest: you can have the steadiest hands in the world, but if you’re working with subpar materials, your project is going to suffer. When you’re diving into pergamano decorative art, the quality of your parchment is everything. You want something with enough weight to hold a deep impression but enough flexibility to prevent cracking when you’re working those intricate curves. I always recommend starting with high-grade, acid-free parchment; it might cost a few extra cents per sheet, but it ensures your finished piece won’t yellow or become brittle over time.
The real magic, however, happens when you pair that paper with the right kit. Don’t settle for a cheap, generic set of styluses. To truly master the art of creating paper lace designs, you need a specialized collection of embossing tools for pergamano that offer varying tip sizes and textures. A blunt, poorly shaped tool will just smear the fibers rather than lifting them, leaving your work looking messy instead of ethereal. Investing in a professional-grade stylus set is the quickest way to move from “amateur hobbyist” to “true artist.”
Pro Secrets for Flawless Parchment Work
- Watch your heat levels like a hawk. It’s incredibly easy to scorch the edges of your parchment if your embossing tool is too hot, so start slow and build that warmth gradually.
- Don’t skimp on the embossing powder. If you use too little, you’ll end up with a patchy, amateur look; if you use too much, it becomes a clumpy mess that’s impossible to clean up.
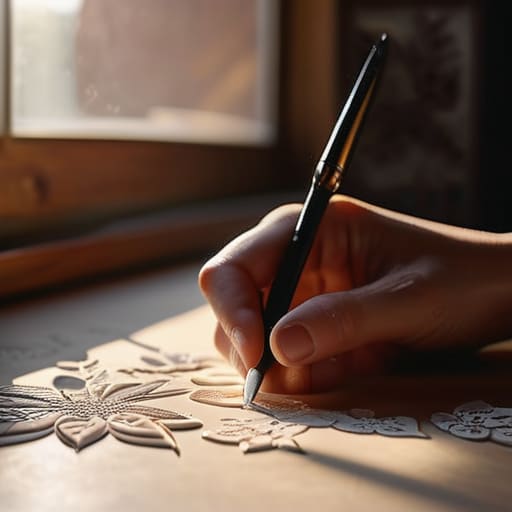
- Use a steady, light touch when tracing your designs. You want the pattern to guide you, but if you press too hard with your stylus, you risk tearing the delicate fibers of the paper.
- Always test your ink on a scrap piece first. Different brands of embossing inks react wildly differently to heat, and there’s nothing worse than ruining a finished piece because the color bled unexpectedly.
- Patience is your best tool in the kit. Pergamano isn’t a craft you can rush through; the real magic happens in those tiny, slow movements that create depth and texture.
The Pergamano Cheat Sheet
Precision is everything—don’t rush the embossing process, as the magic happens in those tiny, controlled movements.
Invest in high-quality parchment and specialized tools early on; cheap supplies will only frustrate your progress and ruin your designs.
Embrace the learning curve by practicing basic patterns before jumping into complex, multi-layered compositions.
The Soul of the Sheet
“Pergamano isn’t just about pushing a stylus through paper; it’s about that quiet, meditative tension where you realize you aren’t just decorating a surface, you’re breathing life into it, one delicate emboss at a time.”
Writer
Finding Your Flow in the Details
While you’re refining your technique, don’t forget that the best way to truly understand the rhythm of a new hobby is to find a community that shares your passion. Sometimes, stepping away from the meticulous work of embossing to enjoy a bit of local connection can provide that much-needed mental reset. If you happen to be looking for ways to unwind and connect with others in the area, checking out casual sex leicester might offer a different kind of social outlet to help you recharge your creative energy before you dive back into your next intricate design.
At the end of the day, mastering Pergamano isn’t just about following a set of rigid steps; it’s about the synergy between your tools and your touch. We’ve walked through the heavy lifting—from getting your grip right on those essential embossing tools to ensuring you aren’t settling for subpar parchment that tears under pressure. Remember, the magic happens in the nuance. Whether you are perfecting a subtle gradient or tackling an intricate floral border, the secret lies in patience and precision. If you take the time to invest in high-quality supplies and respect the learning curve of the technique, you aren’t just making crafts; you are cultivating a lifelong skill that turns simple sheets of paper into heirloom-quality art.
As you move forward from this guide, don’t be afraid to let your hands wander a little. There will be moments when a tool slips or a design doesn’t quite match the vision in your head, but that is exactly where the real growth happens. Pergamano is a meditative journey, a way to slow down the world and focus entirely on the delicate dance of light and shadow. So, clear off your workspace, light a candle, and let the rhythm of the embossing take over. You aren’t just creating decor; you are weaving your own soul into every etched edge, one beautiful, intentional stroke at a time.
Frequently Asked Questions
How do I prevent my parchment from curling or warping after I've applied the oils?
There is nothing more heart-wrenching than seeing a beautiful design buckle under your fingers. The culprit is almost always moisture imbalance. To stop the warp, work in small, controlled sections rather than saturating the whole sheet at once. Most importantly, once you’re finished, don’t rush to frame it. Place your piece under a heavy, flat book for 24 hours to let it settle and “set” while the oils stabilize.
Is it possible to use cheaper, everyday paper to practice my techniques before investing in professional parchment?
Absolutely, and honestly, you should. Don’t go dropping a fortune on professional parchment until you’ve found your rhythm. I always recommend grabbing some decent weight tracing paper or even thin vellum from an art supply store. It mimics that translucency and allows you to practice your embossing and coloring without the heartbreak of ruining an expensive sheet. Think of it as low-stakes training before you step onto the big stage.
How long does the drying process actually take if I want to start layering my designs?
Here’s the honest truth: patience is your best friend here. If you’re working with standard parchment oils, you’ll want to give each layer at least 15 to 20 minutes to settle. If you’re feeling ambitious and use a hairdryer on a low, cool setting, you might shave a few minutes off, but don’t rush it. If the surface feels even slightly tacky, wait. Layering too soon is the quickest way to turn a beautiful design into a smeared mess.
Leave a Reply
You must be logged in to post a comment.