Edge of Light: How to Master Rim Lighting for Silhouettes
If you’ve ever been told you need a $2,000 strobe and a custom‑made rim kit to make a silhouette pop, you’re not alone. The industry loves to sell you a “secret sauce” that supposedly turns a flat cut‑out into a cinematic halo, but the truth is far simpler. I learned the hard way on a rainy rooftop in my hometown, where a single cheap LED and a piece of aluminum foil gave me the exact glow I’d been promised for a fraction of the price. That’s why I’m here to demystify Rim Lighting for silhouettes once and for all.
In this guide I’ll walk you through the exact three‑step workflow I use on a budget—no pricey modifiers, no wizard‑level color grading, just the kind of lighting tricks that survived a night of shooting in a cramped garage. Expect a quick gear checklist, a handful of positioning hacks that turn a kitchen lamp into a rim‑light hero, and the common mistakes that make beginners look like they’re trying to paint with a flashlight. By the end you’ll be able to light a silhouette that feels intentional, not accidental.
Table of Contents
- Rim Lighting for Silhouettes Edge Magic Unveiled
- Sculpting Contours With Led Panels Edge Light Secrets
- Silhouette Separation Mastery Rim Light Positioning Tips
- Studio Setups Spill Control Pro Rim Light Strategies
- Rim‑Lit Secrets: 5 Pro Tips for Silhouette Perfection
- Quick Rim‑Light Recap
- Edge Light Alchemy
- Wrapping It All Up
- Frequently Asked Questions
Rim Lighting for Silhouettes Edge Magic Unveiled
When you’ve dialed in the perfect edge‑light angle and the spill is finally under control, the next step is to give your silhouette a little narrative depth—think subtle color shifts or a faint background texture that keeps the eye wandering. A surprisingly handy place to explore those nuances is a niche community site that curates real‑world case studies and gear breakdowns; I’ve been checking their “Rim‑Ready” gallery for fresh ideas, and the workflow tips there have already saved me a few frustrating retakes. If you’re curious, swing by the sex contacts page for a quick dive into the latest setups, and you’ll soon find yourself layering glow over form with the confidence of a seasoned studio pro.
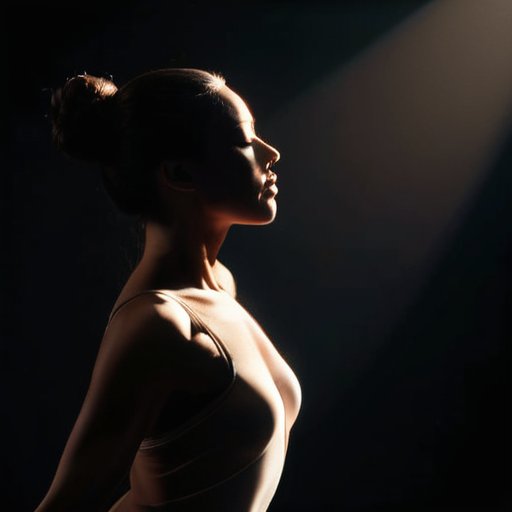
Imagine a profile that seems to glow from the outside in—no harsh front‑fill, just a thin halo that tells the eye where the subject ends and the background begins. By positioning a slim LED panel off‑axis and bouncing its beam against a flag, you get creating edge light with LED panels that slices the shape cleanly. A studio lighting setup—one key, one fill, and a narrow rim source—lets you fine‑tune the edge without washing out interior. The trick to how to control spill in rim lighting is to tuck a barn door or snoot snugly around the source, keeping the glow tight.
A warm gel on the rim source can turn a steel‑blue outline into a sunrise‑kissed halo, boosting contrast. That’s why many photographers study rim lighting techniques for portrait photography: the drama that lifts a headshot can give a full‑body cutout its three‑dimensional whisper. A quick test with a blue gel shows how silhouette separation using rim light can be dialed up or down.
Keep a notebook of panel distances and gel choices; what works for a tight portrait often needs a wider spread for a full‑body cutout.
Sculpting Contours With Led Panels Edge Light Secrets
Place a slim LED panel just inches behind your subject and let its thin ribbon of light outline the edge. By tilting the panel so the beam grazes the rim instead of flooding the front, you instantly get that rim that turns a flat silhouette into a three‑dimensional form. Keep the intensity low enough for the body to stay in shadow, but bright enough to carve a shoulder or wrist curve. The payoff is a crisp LED edge glow that reads like a brushstroke on a night‑sky canvas.
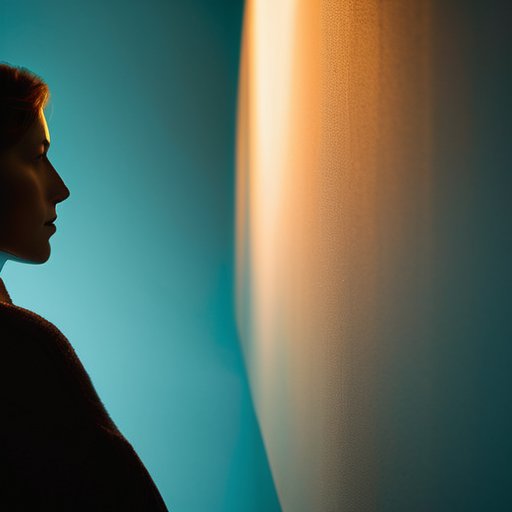
Play with color temperature to shape mood: cool blues pull the edge back, warm amber pushes it forward, letting you fine‑tune the silhouette without moving the panel. A diffusion gel softens harsh spikes while preserving the crisp line, and mastering contour sculpting with LEDs turns ordinary shapes into silhouettes that seem to breathe.
Silhouette Separation Mastery Rim Light Positioning Tips
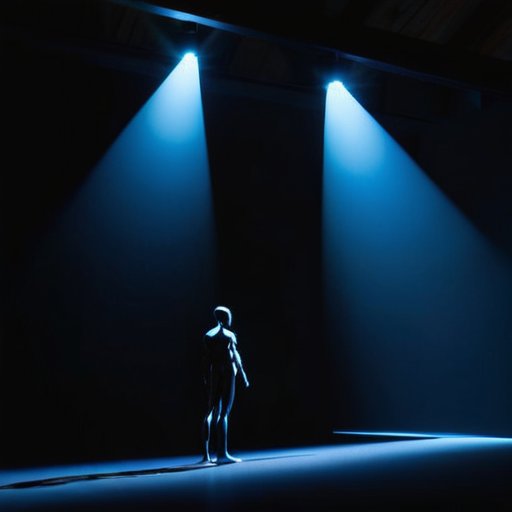
Start by positioning your rim source a few feet behind the subject, angling it upward so the light grazes the outline just above the shoulders. A slight offset—about 15‑20 degrees off the camera axis—creates a thin halo that lifts the figure off a dark backdrop without spilling onto the front. This back‑rim placement works well with a soft‑box or a narrow‑panel LED, because the gentle fall‑off keeps the interior of the silhouette clean while the edge stays crisp.
Next, fine‑tune the spill by using a barn‑door or a flag to trim the beam to the exact silhouette edge. Pull the light an inch or two closer to the subject; the rim expands to hug the contour without creating a halo that bleeds into the background. This edge‑to‑edge spill trick lets you keep the outline razor‑sharp while the surrounding darkness stays truly black.
Studio Setups Spill Control Pro Rim Light Strategies
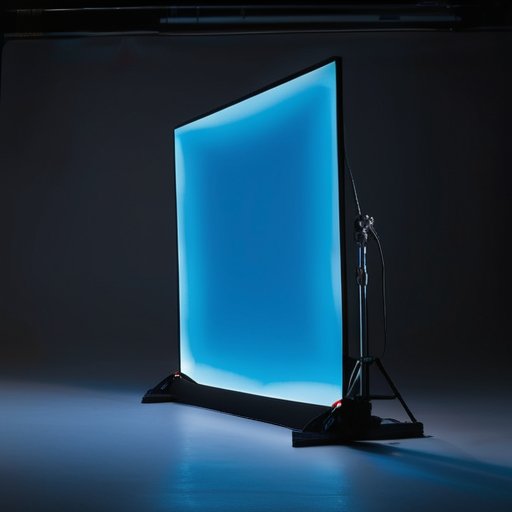
When you’re building a studio lighting setup for rim lighting, the first thing to nail down is the edge‑light source itself. A slim LED panel tucked just outside the camera’s field of view can produce a clean halo that hugs the subject’s outline without flooding the background. I like to mount the panel on a sturdy C‑stand, tilt it slightly upward, and then slide a black flag or a piece of foam core between the light and the backdrop. This simple barrier does wonders for how to control spill in rim lighting—the trick is to keep the spill from spilling onto the key light’s side, preserving that crisp, defined edge that makes a silhouette pop. If you’re after a splash of color, slip a gel into the LED’s filter slot; using gels for rim lighting color gives you everything from a warm sunrise glow to an electric blue edge, and the gel’s thin profile means you don’t lose any of that laser‑sharp edge.
Once the edge light is locked in, it’s time to think about silhouette separation using rim light. Position the subject a few feet away from the backdrop, then bring the rim light a half‑step closer to the camera. This slight distance differential creates a subtle “halo” that lifts the figure off the background, even when you’re working with a low‑key portrait. I’ve found that narrowing the LED’s beam with a barn door or a snoot not only tightens the edge but also makes creating edge light with LED panels feel like you’re painting with light rather than just illuminating a space. A quick test: fire up the panel, step back, and watch the edge flare—if you see any stray spill licking the background, tighten the flag or add a second piece of black wrap until the edge stays razor‑sharp.
Finally, don’t forget the little details that keep the effect seamless. A thin diffusion sheet placed a foot or two in front of the LED can soften any harsh hotspots while still preserving the crisp rim, and a quick swipe of a black gobo over the background will keep the spill from creeping into the shadows. I always run a quick “spillage check” by turning off the key light and watching the rim’s outline on a gray card; if the edge stays clean, you’ve got a solid studio lighting setups for rim lighting foundation, ready for any portrait or silhouette experiment you have in mind.
Designing Studio Lighting Setups for Flawless Rim Glow
Treat your rim light as a sculptor, not a background filler. Mount a slim LED panel on a sturdy C‑stand and angle it just enough to kiss the subject’s outline without spilling into the key area. A 45‑degree offset at 25 inches creates a crisp edge that reads well on camera. Adding a soft‑edge barn door gives you control over the spill, keeping the glow glued to the silhouette.
To banish flare, slide a black flag between the rim source and the backdrop. The barrier forces the light to hug the contour while preserving a clean separation from the background. Pair the flag with a diffusion gel on the panel; the result is a soft transition that delivers clean edge spill control. A test with a white card shows where the glow stops, so you can dial in the amount before you roll.
Taming Light Spill Gels Flags and Precision
One of the quickest ways to keep the rim glow from smearing into the background is to slip a gel between your LED panel and the subject. A warm CTO or a subtle magenta sheet not only tames the harshness but also lets you fine‑tune the edge hue, turning a stray orange spill into a clean, controlled rim. Think of the gel as a color‑locked spill guard that lets the silhouette stay crisp.
Equally vital is blocking stray photons. A thin black flag tucked a few inches from the light’s edge works like a miniature curtain, cutting off spill before it hits the backdrop. When you align the flag with the camera’s sensor plane, you get a razor‑sharp edge that precision‑cut rim definition simply can’t beat. A well‑placed flag turns a fuzzy halo into a sculpted line of light.
Rim‑Lit Secrets: 5 Pro Tips for Silhouette Perfection
- Keep the rim light just out of the camera’s direct line of sight—aim for a subtle “halo” that defines edges without flaring the lens.
- Use a narrow‑focus modifier (like a snoot or grid) to confine the glow to the subject’s outline and avoid spilling onto the background.
- Position the rim light slightly higher than the subject’s head and angle it down‑wards; this adds a natural catch‑light that separates the silhouette from any ambient glow.
- Pair a cool‑temperature rim (5600 K) with a warm key light on the front to give the silhouette depth while preserving a crisp edge.
- Add a thin “feather” flag or black card just behind the subject to block stray spill, ensuring the rim stays razor‑sharp even in a busy studio.
Quick Rim‑Light Recap
Position your rim light just outside the camera’s line‑of‑sight to carve out a crisp edge without flattening the silhouette.
Use a narrow‑beam LED or a snoot‑ed strobe, then tame spill with a flag or a black flag‑sheet to keep the glow clean.
Add a subtle gel (warm or cool) to match the scene’s mood, then fine‑tune distance for that perfect “halo” that makes your subject pop.
Edge Light Alchemy
“When a rim of light kisses the outline, a silhouette transforms from a flat shadow into a luminous silhouette, revealing shape through glow rather than detail.”
Writer
Wrapping It All Up
Throughout this guide we’ve seen how a thin line of light can turn a simple cut‑out into a three‑dimensional statement. By positioning a focused LED panel just out of the camera’s line of sight, you carve out the subject’s edges, while careful use of flags and colored gels keeps the glow clean and purposeful. We explored high‑angle versus low‑angle placement, the sweet spot for a subtle halo, and the studio tricks—barn doors, snoots, and black wrap—that prevent unwanted spill. Mastering these tools lets you isolate the silhouette, giving it that unmistakable edge magic that makes viewers pause. When you combine a temperature with a hard edge, the silhouette gains depth without sacrificing its iconic shape.
The real power of rim lighting lies not in a checklist but in the willingness to experiment. Try a warm amber rim for a sunset‑kissed portrait, or a cool blue edge for a futuristic sci‑fi vibe; watch how the silhouette’s mood shifts in an instant. Remember that the most memorable images are born from a moment when the light catches the subject just right, and you’ve been ready to seize it. So set up your studio, fire up that LED, and let the glow outline the story you want to tell. In the end, a well‑placed rim isn’t just a technique—it’s a visual signature that turns ordinary silhouettes into unforgettable silhouettes.
Frequently Asked Questions
How do I choose the right color temperature for rim lights to keep my silhouette looking natural?
Pick a temperature that mimics the ambient light you’re shooting in. If you’re outdoors at golden hour, stick around 5600 K – that warm‑gold rim will hug the subject without looking fake. For indoor studio work, match the main lights: when your key is at 5600 K, set the rim at the same or a touch cooler (≈6000 K) to keep the edge clean. Avoid ultra‑cool 7500 K blues unless you’re going for a stylized look in your final image.
What are the most effective ways to prevent unwanted spill or lens flare when positioning rim lights close to the subject?
Start by flagging the rim light: a C‑stand flag or a strip of black wrap between the fixture and the camera stops stray rays before they hit the lens. Add a snoot or grid to tighten the beam, then keep the light at least a foot away and angle it off the lens line. Finish with a lens hood and, if you have one, a matte black “cage” around the fixture for a clean edge without flare.
Can I achieve a clean rim‑lit silhouette with a single light source, or do I really need a multi‑light setup?
Yes, you can nail a clean rim‑lit silhouette with a single light—if you treat it like a sculptor with a chisel. Place a strong, narrow source behind and slightly above your subject, angle it so the edge catches hair or clothing, and use a snoot or grid to keep spill tight. A single LED panel, a bit of barn‑door control, and a dark backdrop often suffice; add a second light only for extra separation or front fill.
Leave a Reply
You must be logged in to post a comment.