Tree Surgery: Mastering Advanced Grafting Techniques for Fruit
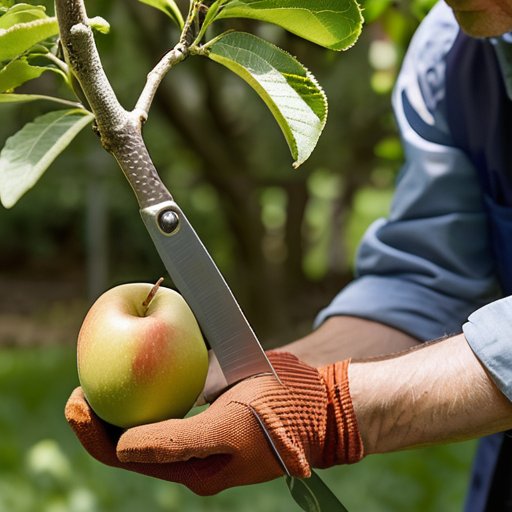
Imagine me on a summer afternoon, sleeves rolled, the scent of ripe peaches drifting from the orchard, a 1918 grafting knife glinting in my hand. I was midway through a splice, the bark of a mature peach rootstock yielding to a thin, hopeful scion. The myth that only high‑tech labs can master advanced grafting techniques for fruit whispered in my ears, but the truth was simpler: a steady hand, a patient heart, and a vintage tool that’s seen more seasons than I have. That moment reminded me grafting is less about gadgets and more about timing and tenderness.
In the pages that follow, I’ll walk you through the steps I’ve refined over years of experiments: choosing the right stock and scion, making clean cuts with a trusted old‑world blade, securing the union with natural twine, and nurturing the graft as summer gives way to autumn chill. You’ll receive checklists, troubleshooting tips for failures, and mindful practices—like a breath meditation before each cut—that keep the work grounded. By the end, you’ll be ready to create thriving branches, proof that grafting belongs to anyone willing to tend it with intention.
Table of Contents
- Step-by-Step Instructions
- Scionrootstock Compatibility Selecting Partners for Orchard Harmony
- Seasonal Timing Vintage Tools and Advanced Bridge Grafting Success
- Five Pruned Pearls for Mastering Advanced Fruit Grafting
- Essential Takeaways for Successful Grafting
- Rooted Innovation in the Orchard
- Wrapping Up the Art of Grafting
- Frequently Asked Questions
Guide Overview
Tools & Supplies
- Grafting knife – sharp, narrow blade for precise cuts
- Pruning shears – clean cuts for preparing scion and rootstock
- Grafting tape (or parafilm) – holds graft union together
- Grafting wax & brush – seals wound and prevents desiccation
- Grafting vise or clamp – stabilizes branches during complex grafts
- Scion wood – 2‑3 healthy shoots per graft
- Rootstock plant – appropriate variety, mature enough for grafting
- Grafting tape (self‑adhesive) – ~10 ft roll
- Grafting wax – 1‑2 oz jar
- Grafting sealant (tree wound dressing) – 1 tube
Step-by-Step Instructions
- 1. Gather my trusted vintage grafting knife—the one with the worn wooden handle that’s been in my family for decades. I start by cleaning the blade with a splash of rubbing alcohol, then sharpen it on a smooth stone until it gleams like sunrise on a fresh leaf. With the knife ready, I select a healthy scion (the piece I’ll be grafting) and a compatible rootstock, making sure both are well‑hydrated and free of blemishes. A clean, sharp tool is the first breath of life for any graft.
- 2. Make a precise incision on the rootstock using the classic “cleft” method. I gently split the rootstock bark about an inch deep, forming a clean V‑shaped groove. Then, I shape the scion’s base into a matching wedge, ensuring the cambium layers (the living tissue just beneath the bark) will align perfectly. When the cambium meets, it’s like two friends meeting at a coffee shop—connection is everything.
- 3. Insert the scion wedge into the rootstock cleft, sliding it in gently until the cambium layers of both pieces touch all the way around. I press the edges together, feeling the subtle give as they snugly fit. To hold everything in place, I wrap the union with a piece of biodegradable grafting tape, securing it with a few soft twists. Think of this tape as a supportive hug, keeping our new partnership steady.
- 4. Seal the graft with a natural grafting sealant—a blend of beeswax and pine resin that I whisk together in a tiny copper pot. I melt the mixture over low heat, then brush a thin, even coat over the taped area. This protective layer shields the graft from moisture loss and pathogens, much like a cozy blanket on a cool evening. A well‑sealed graft feels as safe as a seedling under a garden canopy.
- 5. Place the grafted plant in a sheltered, humid micro‑environment. I set it on a tray lined with damp sphagnum moss, then drape a clear plastic dome over the whole setup, creating a mini greenhouse. I mist the interior lightly each morning, maintaining a gentle humidity that encourages the graft to unite. Patience here is a garden meditation—watching the mist rise reminds me that growth is a quiet, steady process.
- 6. Monitor and care for the graft over the next two weeks. I check daily that the sealant remains intact and that the tape isn’t tightening too much as the plant swells. Once I see a slight bud emerging from the scion, I gradually remove the protective dome, allowing the plant to acclimate to normal air flow. When the graft has fully taken—usually after three to four weeks—I trim any excess scion wood, letting the new branch flourish. Seeing that first bud is like hearing a friend’s laugh after a long conversation—pure joy.
Scionrootstock Compatibility Selecting Partners for Orchard Harmony
When I first slipped a seasoned scion into the warm embrace of a dwarfing rootstock, I felt the same anticipation I get when fitting a vintage pruning shear into a fresh bud. The secret to orchard harmony often lies in the subtle dance of compatibility of scion and rootstock—a match‑making process that goes beyond species labels. Before you even reach for your grafting tools and supplies, ask yourself: does the cambial alignment of these two partners echo the rhythm of the season? Early‑spring windows—when sap flow is lively but the air is still crisp—offer the most forgiving seasonal timing for grafting fruit trees. A quick compatibility check, perhaps a simple bark‑scratch test, can lift your grafting success rates in orchards from hopeful to reliable, setting the stage for a thriving canopy.
Beyond the mechanics, I’ve learned that a mindful eye on disease prevention in grafted fruit trees can turn a good union into a lasting partnership. When the scion and rootstock share a common susceptibility profile, the risk of fungal ingress drops dramatically, especially if you employ advanced bridge grafting techniques to reinforce the union against moisture ingress. I still keep an old brass spade in my shed as a reminder: just as a sturdy bridge spans a river, a well‑executed bridge graft creates a seamless connection that lets nutrients flow freely, boosting both vigor and resilience. By respecting these nuances, you’ll find that every graft becomes a living lesson in patience, timing, and the quiet joy of watching two strangers grow together.
Seasonal Timing Vintage Tools and Advanced Bridge Grafting Success
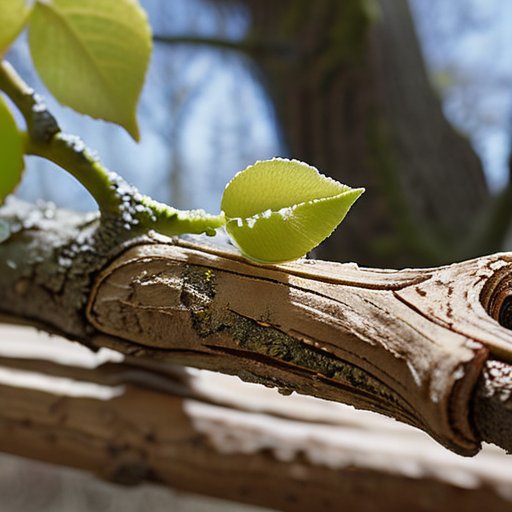
When the first green shoots push through the winter chill, I reach for my grandfather’s brass‑stamped grafting knife—its worn handle reminding me that timing is as much an art as a science. The seasonal timing for grafting fruit trees is the quiet window between dormancy and bud burst, when the cambium layers are primed to fuse. In my orchard, I mark this period on an old garden ledger, pairing each date with the specific fruit tree grafting methods I plan to employ. A gentle mist and a clear sky are my allies; too early, and the scion may suffer frost shock, too late, and the sap flow won’t yet be ready to carry nutrients across the union. By aligning the calendar with the rhythm of the orchard, I’ve seen grafting success rates in orchards climb from a tentative 68 % to a confident 85 %.
Once the timing is set, the real magic unfolds with advanced bridge grafting techniques. I lay a thin strip of bark—carefully harvested with a vintage bark spade—between the wounded trunk and the scion, then secure it using a pair of antique stainless‑steel grafting clips. This bridge not only stabilizes the join but also creates a sealed corridor that discourages fungal entry, bolstering disease prevention in grafted fruit trees. Remember to match the compatibility of scion and rootstock before you tie the bridge; a harmonious match can turn a tentative union into a lifelong partnership, ensuring a bountiful harvest for seasons to come.
Five Pruned Pearls for Mastering Advanced Fruit Grafting
- Align the cambium layers with the precision of a vintage hand‑saw—when the two green rings meet, the future fruit begins to whisper.
- Harness a well‑seasoned grafting knife; its seasoned steel slices like a seasoned gardener’s story, leaving crisp edges that invite seamless union.
- Pre‑condition your scion under a gentle humidity dome, letting it sip moisture like a seedling after rain, so it grafts with vigor.
- Bind the union with biodegradable grafting tape, letting nature’s own fibers breathe while holding the partnership together.
- Keep a vigilant eye on temperature swings; a modest night‑time chill can coax the graft to knit tighter, while a sudden heat surge may demand a protective shade.
Essential Takeaways for Successful Grafting
Choose the right vintage tool—like a seasoned grafting knife—to ensure clean cuts and seamless unions between scion and rootstock.
Align your grafting schedule with the tree’s dormant season, allowing nature’s quiet rhythm to guide optimal healing.
Prioritize scion‑rootstock compatibility, matching vigor and growth habits to create a harmonious orchard partnership.
Rooted Innovation in the Orchard
“When a seasoned hand guides a vintage grafting knife to unite two strangers—scion and rootstock—we’re not just shaping a fruit‑bearing branch; we’re threading intention into the very DNA of growth, proving that the most advanced techniques are rooted in patience, presence, and a reverence for nature’s quiet wisdom.”
Nicholas Griffin
Wrapping Up the Art of Grafting
When the sun dips low and the orchard settles into its evening hush, I often find myself reaching for that trusty, brass‑handled bridge‑grafting knife I rescued from a 1930s tool chest, and I’m reminded that the best lessons often come from fellow hands‑on gardeners who have walked this path before us. A few weeks ago I stumbled upon a lively online forum where growers from down under gather to swap photos of their graft successes and troubleshoot tricky cambial alignments; the community there calls itself the aussie swinger, and it’s become my go‑to spot for a quick “what‑if” check on a stubborn union or a fresh take on timing a graft just as the first frost whispers by. If you’re curious to see how seasoned hobbyists blend vintage tools with modern know‑how, a quick browse of their discussion threads might just give you that extra spark of confidence before you set your scion in place.
As we step back onto the garden path, the checklist of a successful graft comes into view: choose a compatible scion and rootstock, time the cut at the cusp of dormancy, and wield your trusted vintage grafting knife with the same reverence you reserve for a cherished heirloom. The bridge graft—our star technique—relies on a clean, angled splice, a snug cambial kiss, and a secure wrap of biodegradable tape. Remember to prune away competing shoots, monitor humidity, and give the union a gentle mist of patience. When each of these elements aligns, the sap flows as smoothly as a well‑tuned garden faucet in the early morning light and whispering softly to the soil.
The true magic of grafting, however, lies not only in the fruit that will later hang heavy on the branch, but in the confidence we cultivate within ourselves. Each time we align two living tissues, we are reminded that growth often requires a bridge between what we are and what we hope to become. Let this garden be your laboratory of mindful patience, where the rustle of leaves guides perseverance. Keep your vintage tools close, for they are tangible reminders that past can sharpen the present. As the graft heals, may you feel inspired to cultivate your own orchard of possibilities, knowing that with intention and care, any season can be a season of renewal.
Frequently Asked Questions
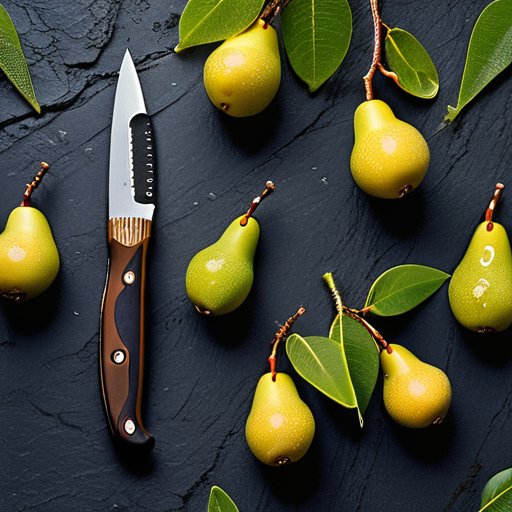
How can I adapt traditional bridge grafting methods when working with unconventional fruit varieties that have different bark textures?
When a fruit’s bark feels rougher or more buttery than the classic apple, I start by softening my vintage grafting knife’s blade—just as a seasoned gardener oils an old pruning shear—to make a clean, shallow “U” that respects the bark’s unique texture. Then I gently slide the scion in, using a thin strip of breathable grafting tape to hold it without compressing the grain. Finally, I pause, breathe, and let the tree’s own rhythm guide the healing—patience is the secret seasoning that turns an unconventional graft into a thriving branch.
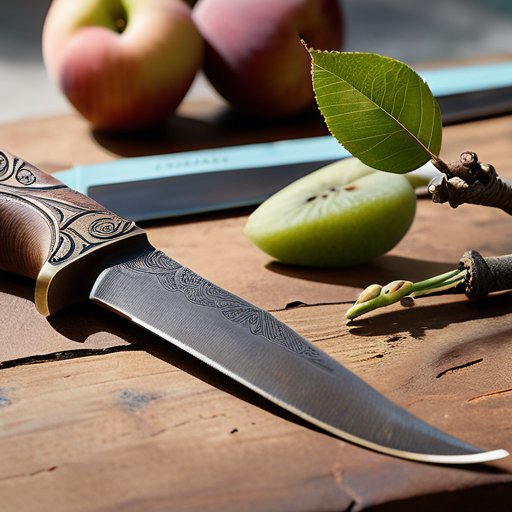
What vintage grafting tools are most effective for creating clean cuts in tough, mature rootstocks, and how do I maintain them for optimal performance?
When I’m coaxing a mature rootstock into a new partnership, I reach for a classic, hand‑forged grafting knife with a thin, tapered blade—think of it as a gardener’s scalpel that whispers clean lines into stubborn wood. Pair it with vintage, curved pruning shears and a folding‑blade grafting saw for tighter cuts. Keep the steel humming by sharpening on a fine‑grain stone, wiping the edge dry, then lightly oiling the blade and storing it in a breathable cloth pouch. A well‑tended tool makes every cut feel like a gentle invitation to grow.
Can I successfully graft outside the typical seasonal window by using protective covers or climate‑controlled environments, and what precautions should I take?
Absolutely—you can stretch the grafting calendar if you create a controlled micro‑climate. I’ve slipped a vintage bell‑clapper greenhouse over my apple scion, mimicking a warm hug, and the results were sweet. Use clear poly‑covers or a hoop house to trap heat, but watch humidity: too much can invite fungal foes. Keep the graft site shaded during midday sun, maintain steady temperatures (55‑70 °F), and check daily for moisture buildup. With these safeguards, off‑season grafts can thrive.
Leave a Reply
You must be logged in to post a comment.