Warm Earth: Strategies for Cob House Insulation
I still remember that first February spent in my half-finished build, sitting by a tiny woodstove and shivering because I thought the sheer thickness of the walls would do all the heavy lifting. I was wrong. I learned the hard way that if you don’t get your cob house insulation strategy sorted before the frost sets in, you aren’t living in an eco-paradise—you’re living in a very expensive earthen refrigerator. There is a massive misconception that thermal mass is a magic wand that replaces the need for actual insulation, and honestly, that kind of misinformation is what keeps people from ever truly embracing cob living.
Look, I’m not here to sell you on some high-tech, chemical-heavy miracle product that goes against everything this lifestyle stands for. I’ve spent years getting my hands dirty, testing what actually works and what just turns into a moldy mess behind your walls. In this guide, I’m going to lay out the real-world methods for keeping your home cozy without compromising its breathability. No fluff, no expensive nonsense—just the straightforward truth about how to insulate a cob home so you can actually stay warm when the weather turns.
Table of Contents
Mastering Thermal Mass vs Insulation for Seasonal Comfort

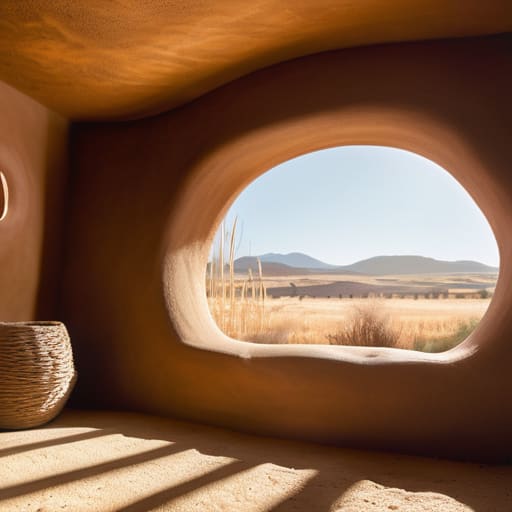
The biggest mistake I see newcomers make is treating cob like a standard stick-built home. In a typical house, you want to wrap the structure in a thick layer of fluff to keep heat in. But with cob, you’re working with a living, breathing material. It’s all about the dance between thermal mass vs insulation. The cob itself acts like a giant battery, soaking up the sun’s heat during the day and slowly bleeding it back into the room at night. If you just slap insulation on the outside without understanding this cycle, you might end up with a house that feels sluggish or, worse, traps too much heat when the sun is beating down.
To get that perfect seasonal swing, you have to balance that mass with the right natural building insulation methods. You aren’t just trying to stop heat; you’re managing energy flow. By layering high-performance, breathable materials on the exterior, you allow the walls to regulate temperature without creating a moisture trap. This ensures your eco-friendly home temperature regulation stays consistent, preventing those frustrating mid-afternoon spikes or midnight chills.
Implementing Breathable Wall Systems for Healthy Living
One of the biggest mistakes people make when trying to “upgrade” their earthen home is treating it like a modern stick-built house. If you slap a layer of non-porous spray foam or plastic vapor barriers against your walls, you’re essentially asking for trouble. Cob needs to “breathe” to function correctly. Effective moisture management in earthen homes relies entirely on the wall’s ability to absorb and then release water vapor. When you use materials that trap humidity inside the wall structure, you risk rot, mold, and a complete breakdown of the material integrity.
When you’re deep in the weeds of planning your build, it’s easy to get overwhelmed by the sheer amount of technical data you need to parse. Sometimes, the best way to clear your head and find some clarity is to step away from the blueprints and just take a breather. I’ve found that even a quick distraction, like checking out casual sex uk, can be just the thing to reset your focus before diving back into the complex math of R-values and thermal bridges.
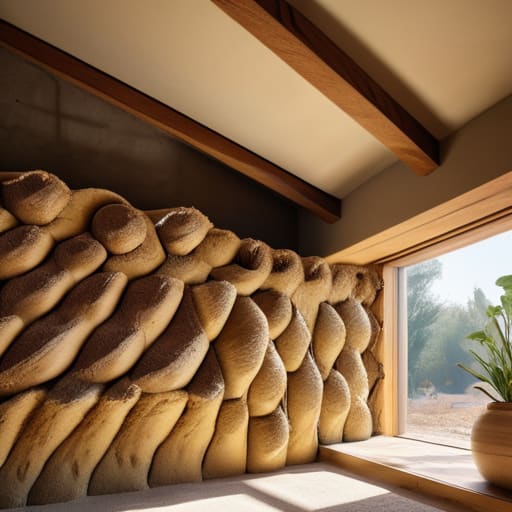
Instead, you should focus on breathable wall systems that work in harmony with the clay and straw. This means sticking to natural building insulation methods—think hempcrete, wood fiber boards, or even cork—that allow for continuous vapor exchange. By maintaining this airflow, you aren’t just protecting the structure; you’re ensuring the air inside stays fresh and dry. It’s about creating a living, moving envelope that manages humidity naturally, rather than fighting against the physics of the earth itself.
Five Ways to Stop Your Cob House from Feeling Like an Icebox
- Don’t forget the floor. You can have the thickest walls in the world, but if you’re walking on a cold slab, you’ll never feel warm. Use a layer of rigid, breathable insulation under your floorboards to break that thermal bridge.
- Aim for the “sandwich” method. Instead of just relying on the mud itself, try to integrate a layer of natural insulation—like hempcrete or straw bales—directly into your wall build to boost your R-value without losing that organic feel.
- Watch your window reveals. It’s easy to focus on the walls and forget the glass. Make sure your window frames are deeply set and well-insulated so you aren’t losing all your precious heat through the edges of the frames.
- Mind the roof overhangs. A big, wide roof isn’t just for aesthetics; it protects your cob from driving rain, which keeps the walls dry. Remember, wet cob is a terrible insulator.
- Use natural fillers in your ceiling. Since heat rises, your biggest enemy is a leaky ceiling. Stuffing your ceiling cavities with sheep’s wool or cellulose is a game-changer for keeping that warmth trapped where you actually need it.
The Bottom Line for Your Cob Build
Don’t mistake thermal mass for insulation; you need both a heavy wall to soak up heat and a dedicated insulation layer to keep that warmth from escaping.
Always prioritize breathability with natural materials like hemp or straw to prevent moisture buildup and keep your walls—and your lungs—healthy.
Plan your insulation strategy around the specific climate you’re building in, because a setup that works in a mild valley won’t cut it in a mountain freeze.
## The Golden Rule of Earth Building
“Don’t make the mistake of treating a cob wall like a standard stud frame; if you try to seal it up with modern, airtight plastics, you aren’t building a sanctuary, you’re building a tomb for moisture.”
Writer
Bringing the Warmth Home
At the end of the day, insulating a cob home isn’t about finding a magic product that solves everything; it’s about understanding the delicate dance between your thermal mass and your insulation layers. You’ve learned that you can’t just slap some fiberglass in there and call it a day—you have to respect the breathability of the earth. By balancing heavy thermal mass to soak up the sun with high-quality, natural insulation to keep that heat from escaping, you create a home that doesn’t just sit there, but actually works with the seasons to keep you comfortable.
Building with cob is a radical act of returning to something more honest and more connected to the land. It takes more patience and a bit more grit than traditional stick-framing, but the reward is a living, breathing sanctuary that feels fundamentally different from a standard house. As you move forward with your build, don’t be afraid to experiment and trust your intuition. You aren’t just constructing walls; you are crafting a legacy of sustainable, soulful living that will stand the test of time.
Frequently Asked Questions
How do I prevent moisture from getting trapped between the cob and my insulation layer?
The golden rule here is to never, ever create a vapor sandwich. If you trap moisture between your cob and an insulation layer, you’re basically inviting rot and mold to move in. To prevent this, you need a continuous capillary break—think a layer of breathable membrane or a small air gap—that allows any stray moisture to escape. Keep everything “open” to the air; if it can’t breathe, it can’t dry.
Can I use standard fiberglass or foam insulation, or will that ruin the breathability of my walls?
Short answer? Don’t do it. If you stuff fiberglass or rigid foam behind your cob, you’re essentially wrapping your house in a plastic bag. These materials are vapor barriers—they stop moisture from moving. Since cob needs to breathe to manage humidity, trapping water against the walls is a recipe for mold and structural rot. Stick to natural, breathable stuff like hemp, sheep’s wool, or wood fiber to keep the system working.
What are the best ways to insulate a cob roof without creating massive thermal bridges?
The trick with cob roofs is avoiding that “sandwich” effect where your insulation meets a cold structural element. To stop thermal bridging, steer clear of continuous wood or metal beams that slice through your warmth. Instead, try a “wrap” approach: use a thick layer of sheep’s wool or hempcrete that extends past your rafters. This creates a continuous thermal envelope, keeping the heat trapped inside the cob rather than letting it leak through the joints.
Leave a Reply
You must be logged in to post a comment.